3D printed cone winder experience
Article has been updated; jump to Update.
Intro
I decided to try printing a cone winder when I more or less stumbled upon a 3D model for the “Cone Winder for CSM” from Yarnico on MakerWorld. I only have a normal yarn winder for hand knitting, and the balls I can create with it are okay. But yarn on a cone just knits up better with a machine than yarn on a ball.
The designer describes the concept of the cone winder as follows:
For this design, my ideal was to create a fully 3D-printable hand-crank yarn winder:
– No metal screws, bearings or shafts,
– Every component is designed to be printed in PLA or PETG
– Easy assembly .The sliding mechanism is based on the concept of a Scotch yoke, adapted for smooth reciprocating motion. To simplify assembly, I try to integrate the bearing structure and thread directly into the main gear as a single printable part. This reduces the total part count and keeps the winding motion smooth even without traditional bearings.
Beside hand-crank version, this design also supports a motorized winding mode.I reserved space to mount a DC-motor. In my previous test, It should work in low speed (around 150 RPM) . If you would like to install the motor, you will need to buy some metal screws and a flange coupler. See assembly instructions for details.
The pictures looked good an the text sounded promissing. So, I gave the “Cone Winder for CSM” a try.
Printing and Setting up
The first obstacle I experienced was that only the STL files (Stereolithography, later „Standard Triangle Language“ or „Standard Tessellation Language“) were provided on MakerWorld, yet. To print the model, the objects had to be placed, organized, and sliced on the plates that go into the printer. I spent a morning first downloading the matching software and the STL files for the cone winder, and then preparing the printing files. If I figure out how to do it, I will add the files to the model on MakerWorld such that other can use them too.
Since no one had uploaded any printing experience for that model yet or shared any of the sliced printing files, I could not see the printing time before. Now, with the sliced model ready to be printed, my software was giving me a time estimate of a total of 17 hours and 45 minutes with a usage of almost 660g filament! That was a bit of a shock.
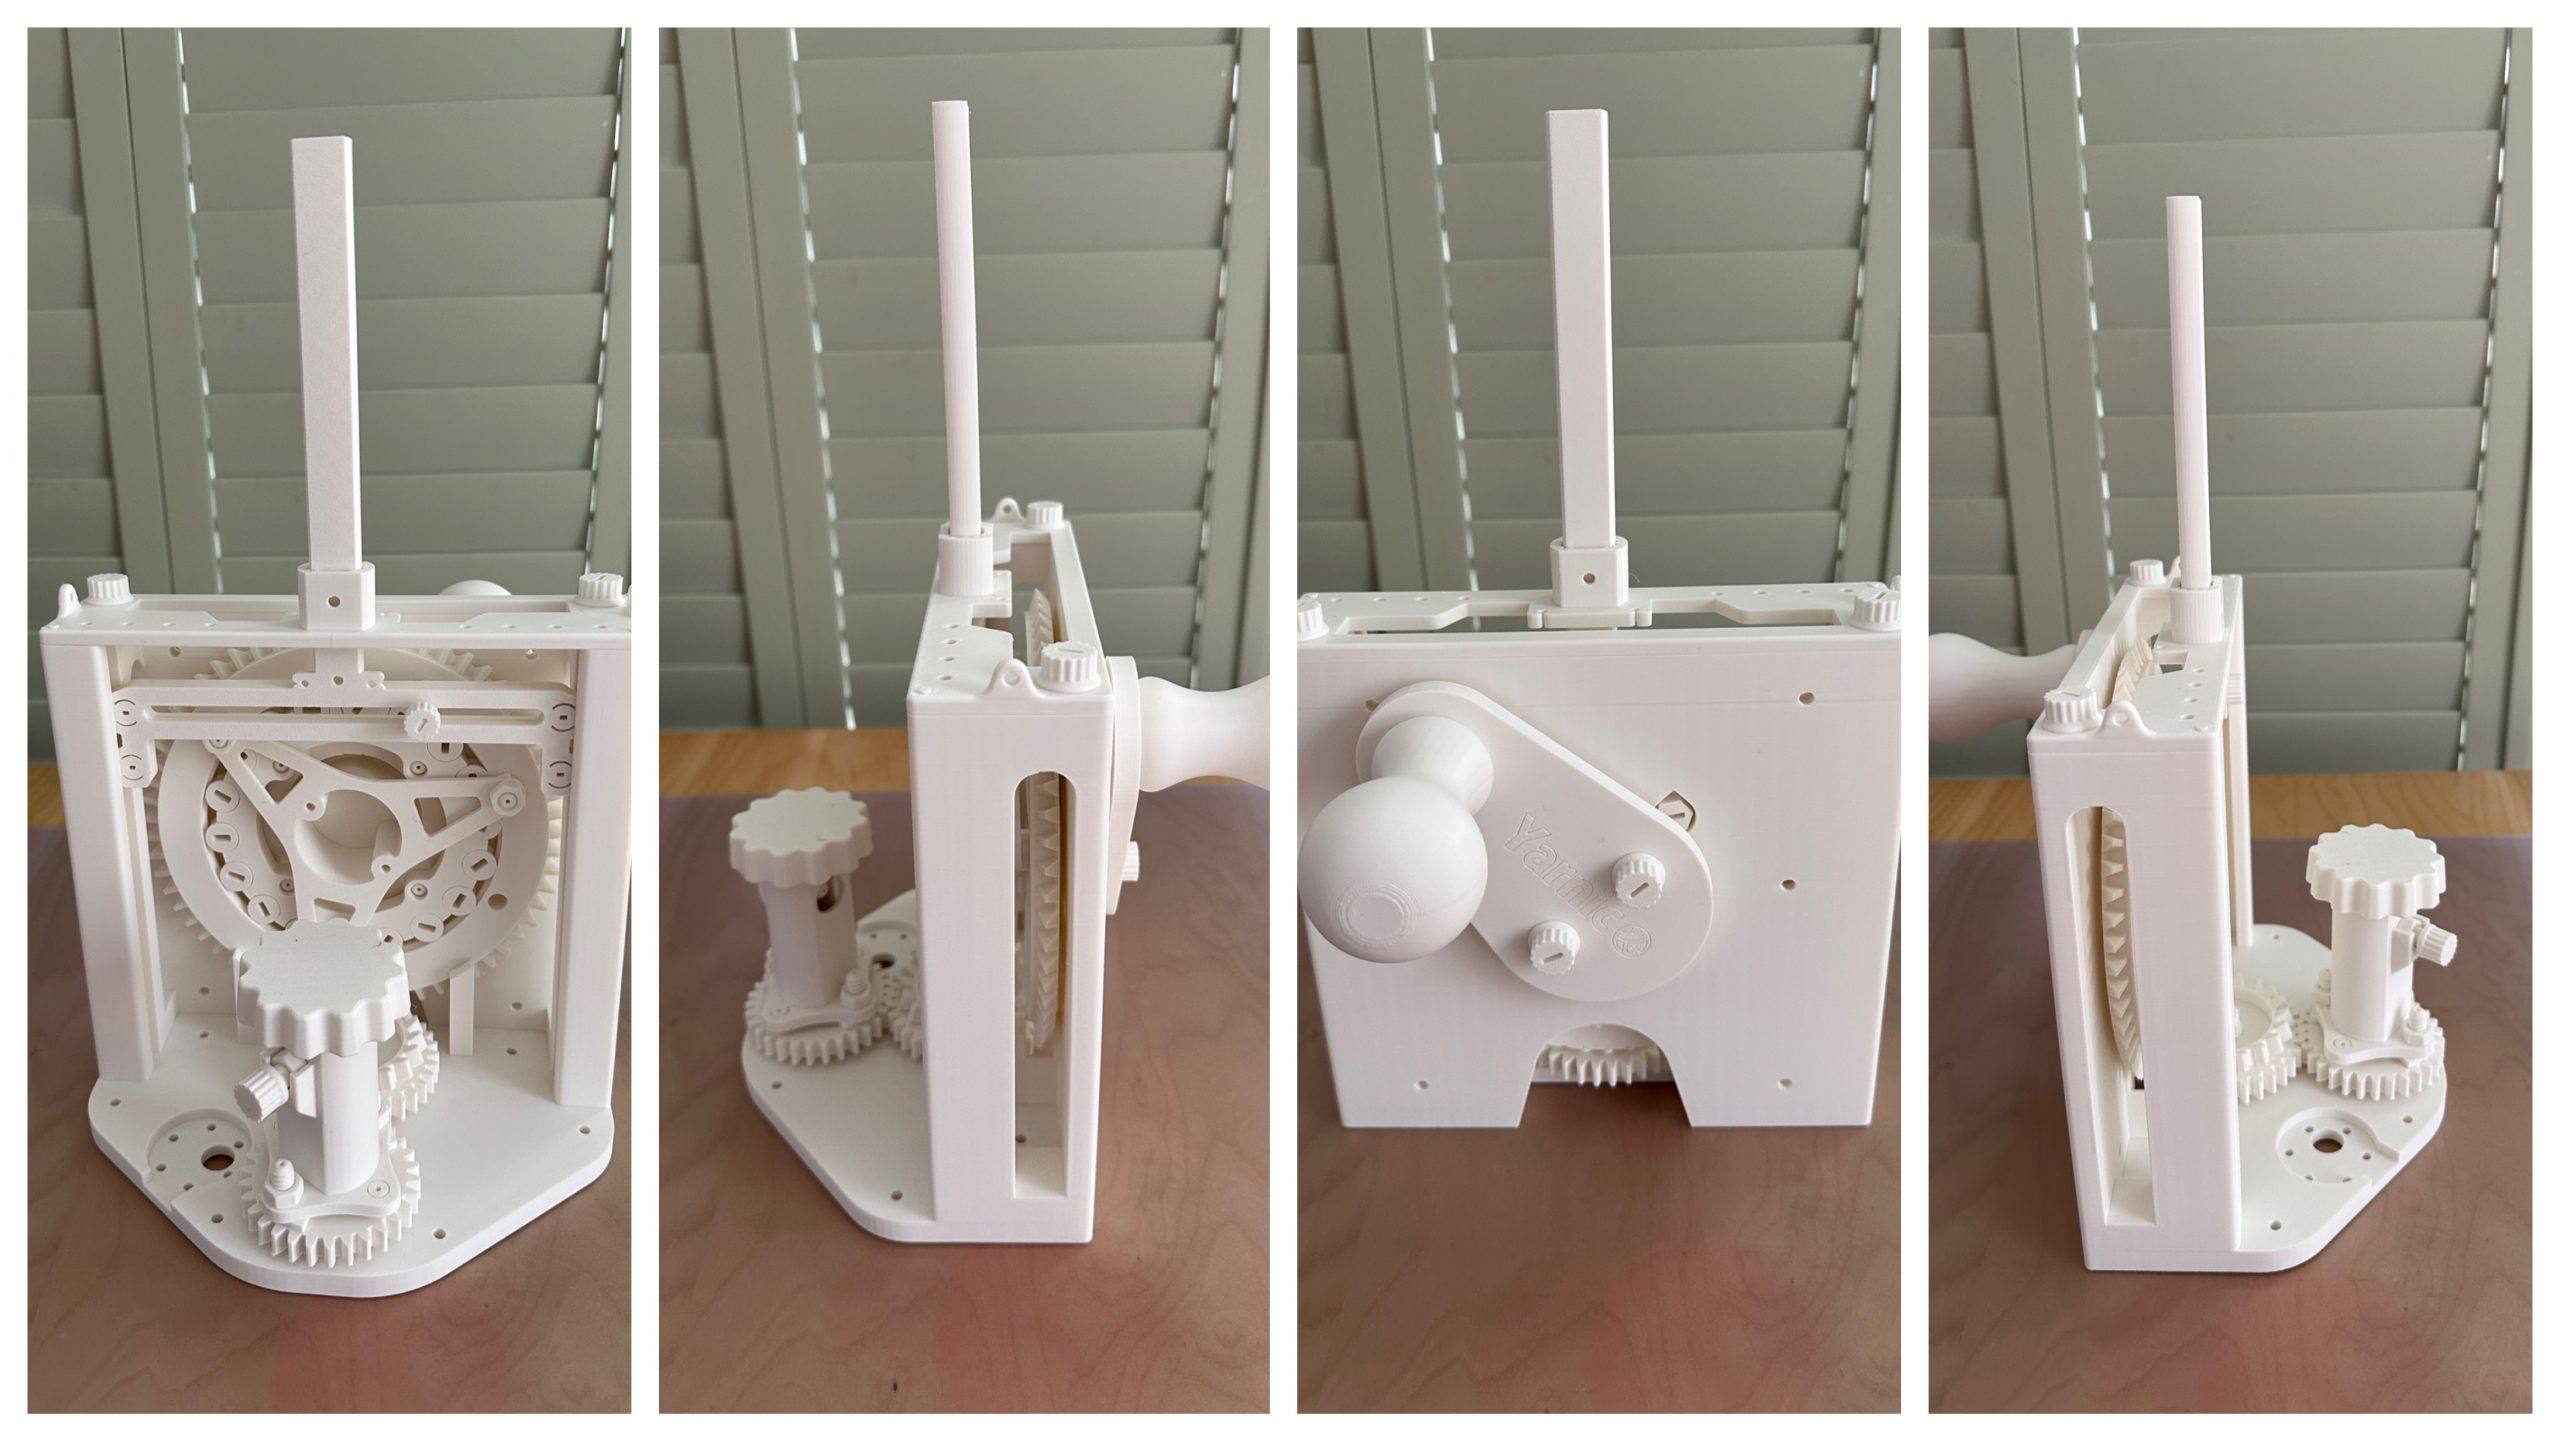
It took me two full days to print all the parts. The result looked very fancy.

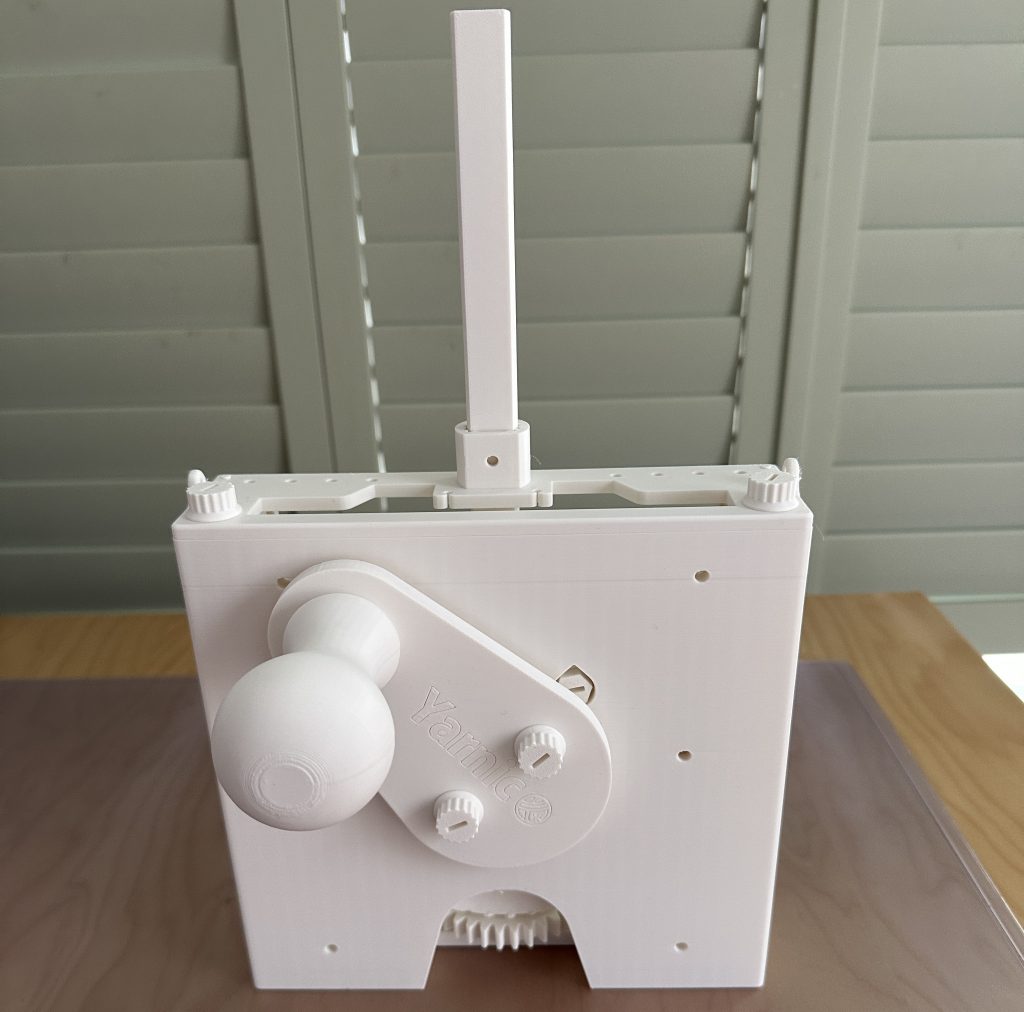
Today, I had time to assemble the cone winder. This was done quickly and without problems thanks to the assembly guide. The following picure is showing the back with the hand crank.
Usage
Of course, I had to try the cone winder as soon as I had it put together. I had some yarn on a toilet paper roll (NOT a good solution, as you can see in the video later). I had wanted to put that yarn on a cone for a while already.
The first thing I recognized was that it was impossible for me to use the winder without having it attached to the table. All gears and bearings are made from plastic and are very light weight. The winder has hardly any weight that keeps it standing on the table when in use. And the parts do not move as smoothly against each other as they would if they were made from metal (which might also have some grease). Therefore, I used a standard clamp to hold the winder on the table.
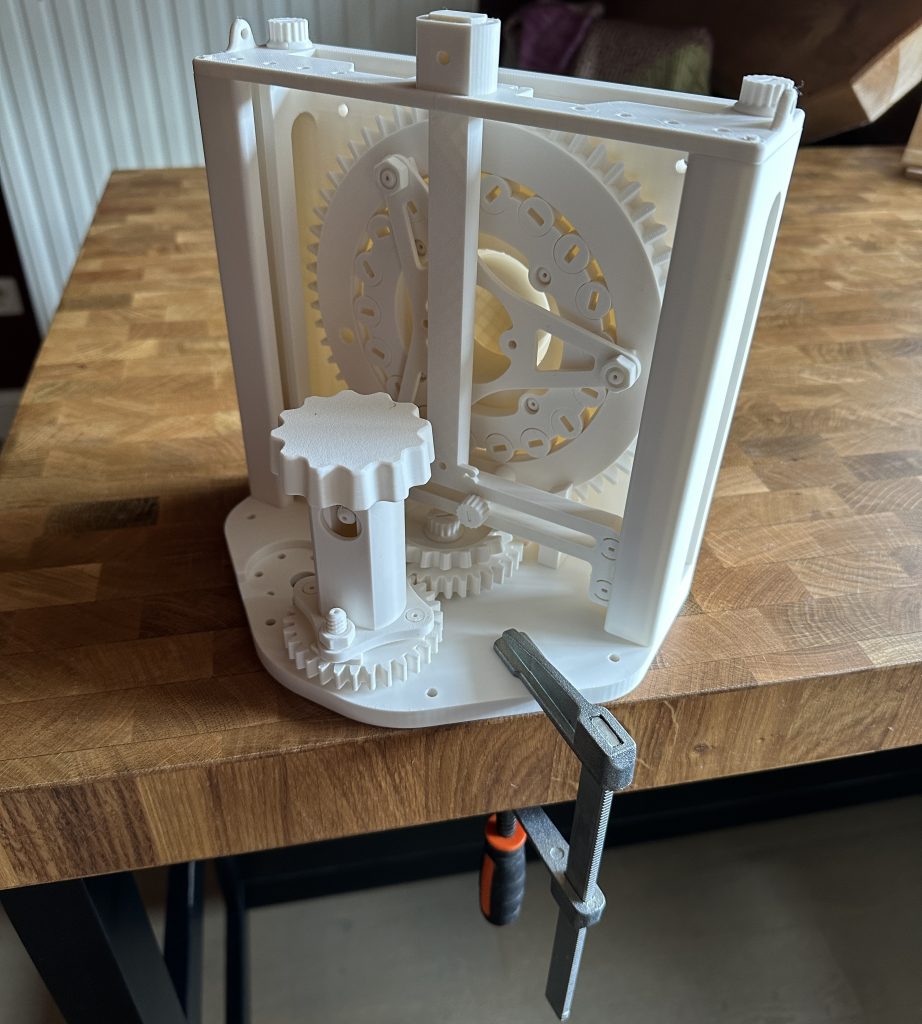
Next, I must say that I totally and absolutely do not understand the mechanism that should hold the yarn cone in place. Maybe it is the limitation of my brain. I do not know. The cone holder is shown in the photo above, at the front. The part that looks like a very big screw. You can move the piece up and down, but it will not stay in the upper position. There is a small screw to ensure the holder cannot fly out of the holder base, but the screw will not prevent the cone holder from falling back to the bottom due to gravity. I took a video to demonstrate my confusion.
I also do not understand how the cone should nicely stay in place on the cone holder (which it is not doing). In addition, the cone is sometimes hanging so low that it is even interfering with the gears below the holder. But maybe my cone was to large for the winder?
At the end, I placed the cone loosely on the cone holder. I also had to removed the screw because that was interfering with the placing of the cone. With the screw in place, I did not manage to place the cone straight on the holder.
In the next video showing the cone winder in action, my old yarn ball is flying off the table. That is not the fault of the cone winder; it is the fault of me using a toilet paper roll as a cone replacement. The yarn occasionally gets stuck on some paper edges and that lifts the whole thing off the table. No blame on the poor cone winder! Before that happend the cone winder did its job and wound the yarn up and down around the cone.
My current personal conclusion
Nice but “da ist noch Luft nach oben” as we German use to say; meaning there’s still room for improvement.
On the plus side, you can build a whole cone winder without metal by yourself. That is rather cool (and nerdy, I love that). The engineering considerations behind the placement of the bearings and gears are interesting. And it is in principal working and doing its job. If you have the time and some filament the costs for the cone winder are really low (~15 EUR for the filament plus power consumption and usage of the printer).
On the other hand, the usage of the cone winder is far from being smooth. The winder gets stuck often and would not stay in place at all without the clamp. Even the clamp was moving. It would be best to screw it onto a plate or table. The whole movement and vibration on the cone winder were loosening some of the screws. I had to tighten the screws holding the crank holder to the main gear and the screw for the cone holder halfway through caking my mini-cone. Having the cone touch the gears every now and then was also not helping with smooth usage.
I have difficulty imagining how the device will work with a motor (I might still try that out). The whole cone winder will lie on its back, where the crank is currently attached. The crank will not be used, and the device can lie flat. That might have a good effect on the gear movement. But a motor is “just rotating” and does not have any sensors to detect or act if the cone winder gets stuck. Maybe that is the reason why only a slow speed of the motor is recommended? And I can imagine even less why the cone should stay in place on the cone holder. I have a strong feeling that I am missing something important here …
So, in total, I am not sure if I can completely recommend printing the cone winder as it is right now. To me, the winder is generally a good idea and, to a certain degree, well thought through, but it could use some improvement.
- It needs to run smoothly enough that it does not get stuck so often, and the screws do not get loose – I might try some special grease.
- It needs its own mechanism to clamp it to the table. The winder is so lightweight that it will always lift off the table with every upward movement of the crank, even if the gears move smoothly.
- At the very least, I need an explanation of how the cone should be held in place, or the holder needs a general improvement.
But there were also moments when it was moving almost smoothly. I will continue using it and try to come up with some ideas to improve it.
Update 09. Feb.
After I got a message from even two friendly readers of my blog, I got the tip that I put the screw that will hold the cone holder in place the wrong way around! After I fixed that, the cone holder is properly attached and will keep the cone away from the gears! Thank you, dear readers!
I also got some grease for the gears and bearing. That worked magic and the cone winder is now moving loud but smooth. I used Super Lube Multi-Purpose Synthetic Grease with Syncolon. I still need to mount the winder on the table, but this is only a small thing. I am looking forward to use the cone winder!
Update End February:
I still worked on improving my cone winder. But I gave up on it. I am so frustrated right now. I spent one whole day on yarn winding … no, wrong. I spent a whole day trying to wind any yarn. But to be honest, I was untangling and removing knots most of the time. Eventually, I gave up. I’ll tell you what happened: After I was a bit disappointed with my self-printed cone winder, I got some help figuring out how it actually works and I added some grease. I was very positive and optimistic that the cone winder would work nicely (see first video below). But no.
Here come the disadvantages: Although I could adjust the height of the cone holder, the cone was loosely on the holder. It was wobbling quite a bit. The cone holder itself is mounted with one screw to the bottom plate only, which makes it wobble even more. The movement of the hand-crank and the wobbliness of the cone and cone holder together with all the rest of the movement of the gears made the whole system kind of wobbly. The yarn got caught more and more often by screws where it was running smoothly next to them at the beginning. Since everything was nicely covered in grease, I was not willing to deal with the screws and gears during the yarn winding process. At the end, my fingers, the yarn, and the table were still covered in grease just because I had to get the yarn out of the cone winder system so often. I managed to get my yarn off and put the cone winder in the furthest corner where it has to wait until I eventually cool down and maybe, just maybe, will check on it again. …
The fun and enthusiasm of printing something myself clearly vanished for this item.